Setting more than one call owner for a contact in HubSpot
While editing HubSpot integration in your Dexem account, you can define an owner for the calls and contacts created in HubSpot through the integration.
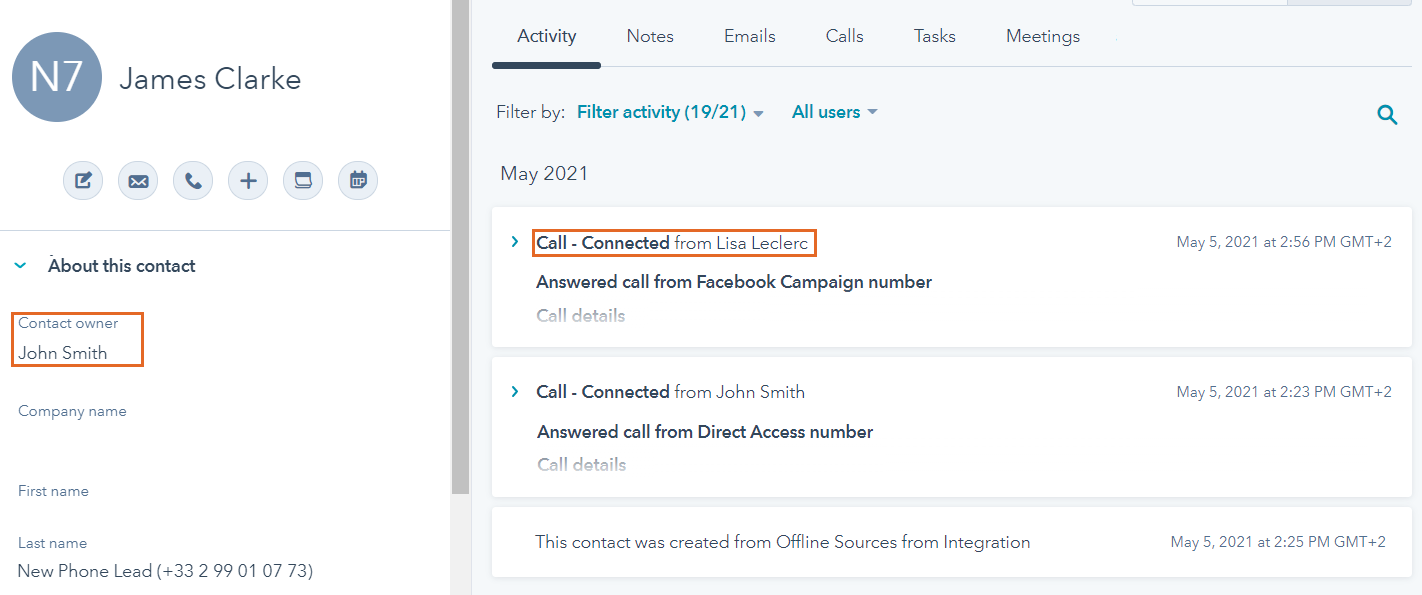
By default, a contact owner is also assigned to all the calls created for this contact. However, there is a way to define more than this one owner for calls from the same contact, depending on the tracking number that has been called.
Finding the account users’ ID User HubSpot
In your HubSpot account, each used is assigned an identification number called ID User HubSpot. It is used to identify all the potential call owners available with the integration between HubSpot and Dexem Call Tracking.
To see the IDs of the users in your Dexem account, first open the HubSpot integration’s edition form. In the section Call Creation in Hubspot, open the dropdown menu of the Call Owner field.
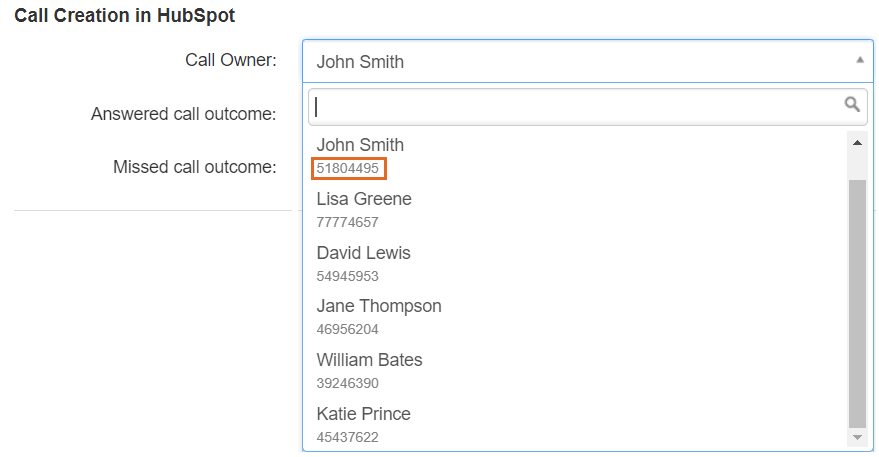
Then, you will see each user’s ID User HubSpot below the user’s name. At this stage, please write down the IDs of the users to be added as other call owners.
Creating a custom field with the IDs User HubSpot
To add a new custom field based on the IDs User Hubspot, first you must activate custom fields in your account. You will find the detailed process to do so in this article.
Then, still in the Custom Fields part in Account settings (which you can get to by clicking on your profile icon at the top right), click on the Add new button to add a new custom field.

In the creation form, define a title for the new ID User HubSpot, and set None and all the IDs of the users to be defined as owners of your tracking numbers.
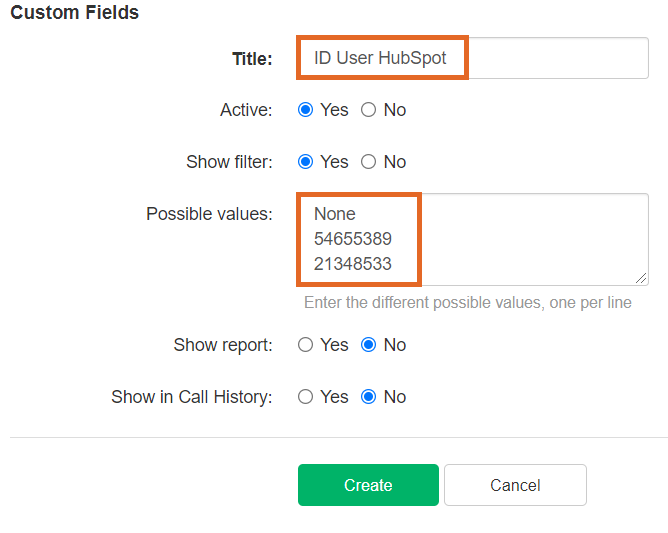
Then, click on Create to save your new custom field.
Assigning an ID User HubSpot to each tracking number
This way, each tracking number is assigned to a user through their ID User HubSpot. And then, this user becomes a call owner in HubSpot each time a phone call is received on the tracking number assigned to this user.
In the Numbers tab, open the edition form of a tracking number by clicking on the Edit icon on the right on its raw. In the Custom Fields section of this form, you can see the field ID User HubSpot you have just created. There, open the dropdown menu and select the ID of the user to become the call owner for this tracking number.
![]()
Click on Update to save your changes, and then get back to the list of your tracking numbers. For the numbers that have been assigned an ID User HubSpot, you can see the ID in a column on the right.
![]()
Defining the ID User HubSpot field as the call owner
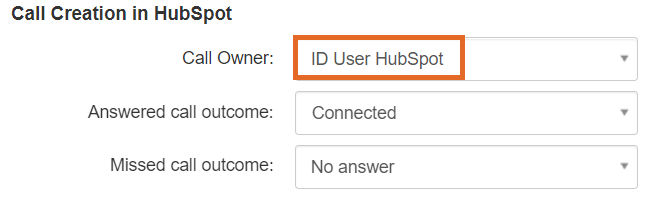
The last step takes place in the HubSpot integration’s edition form. In the section Call Creation in HubSpot, define your new custom field ID User HubSpot as the call owner. Then, click on Update to save your changes.
This way, depending on the tracking number the inbound call is received from, there will be several possible values for the call owner. These values are the IDs User HubSpot saved for this custom field. Concretely, this means that in your HubSpot account, you will see phone calls from the same contact assigned to different owners, in accordance with the tracking number the calls came from.